However, until now those options were not yet implemented in the batch processor. While introducing the image export options, I also had to partly change the way command-line parameters are passed to the batch processor.
As usual, up-to-date packages for Linux, MacOS and Windows 64 bits are available from here.
You can get an exhaustive help for the new batch processing options by typing
photoflow --batch --helpwhich will give you the following output:
$ photoflow --batch --help
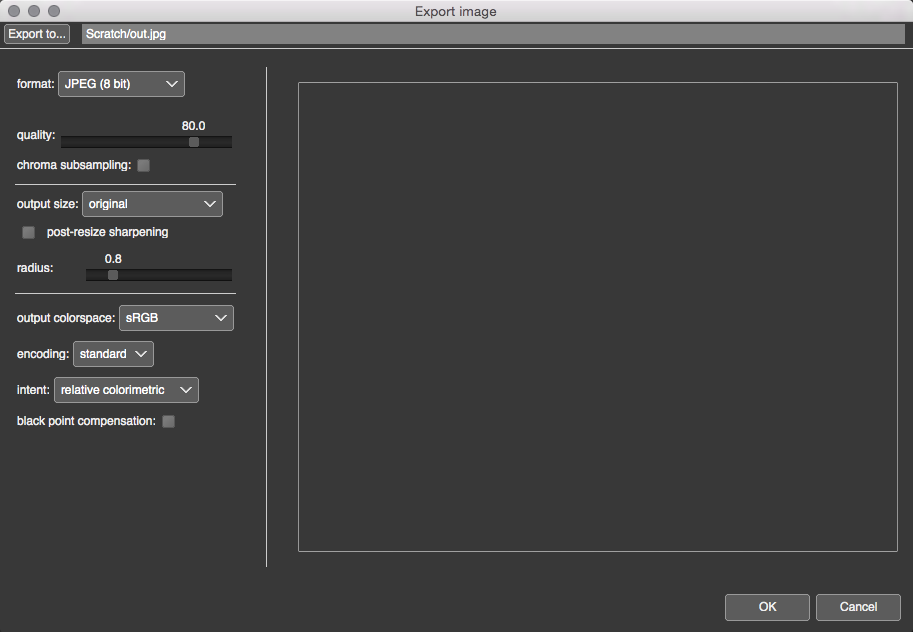
Usage: photoflow --batch [--config=config_file.pfi] --export-opt=[export options] in_file out_file
Export options (comma-separated list):
jpeg_quality=[0..100] (default: 80)
jpeg_chroma_subsampling=0/1 (default: 0)
jpeg_quant_table=default:medium:best (default: best)
tiff_depth=8:16:32 (default: 16) tiff_depth=32 generates an image in floating-point format
tiff_compress=0/1 (default: 0)
width=X (width of the exported image in pixels)
height=X (height of the exported image in pixels)
sharpen_enabled=0/1 (default: 0) enable/disable post-resize sharpening step
sharpen_radius=X (radius for the post-resize sharpening step)
profile_type=X (default: sRGB) ICC profile for the exported image
allowed values are:
no_change: keep the image in the same colorspace used for processing (by default linear Rec2020)
sRGB, Rec2020, AdobeRGB, ProPhoto, ACEScg, ACES: convert the image to the specified colorspace
from_disk: use a custom ICC profile from disk
profile_name="X.icc" path to profile from disk when "profile_type" is set to "from_disk"
trc_type=standard:linear:perceptual:sRGB (default: standard) TRC of the output ICC profile
the meaning of the values is:
standard: use the standard TRC for the selected colorspace
for example: sRGB TRC for the sRGB colorspace, gamma=2.2 for AdobeRGB, etc...
linear: linear (gamma=1.0) TRC
perceptual: same TRC as defined in the CIELab L channel specifications
sRGB: same TRC as defined in the sRGB specifications
Notice that this option has no effect when using a custom profile from disk
intent=relative_colorimetric:perceptual:saturation:absolute_colorimetric (default: relative_colorimetric)
Rendering intent for the output ICC conversion.
Note that only relative and absolute colorimetric intents are implemented for the built-in colorspaces.
Perceptual and saturation intents might be available when using LUT profiles from disk.
bpc=0/1 (default: 1) enable/disable black point compensation in the output ICC conversion
Example:
--export-opt=tiff_depth=16,tiff_compress=1,width=800,height=600,sharpen_enabled=1,sharpen_radius=0.5,\
profile_type=Rec2020,trc_type=linear
As you can see, the export options are appended as a comma-separated list of parameter=value pairs. In addition, one or more .pfi configuration files can be specified by appending several --config options. The processing parameters in the .pfi files will be sequentially applied to the input image (the parameters of the first --config option are applied first), before exporting to the output format.
The last two command-line arguments are the names of the input and output image files. The format of the output image is automatically guessed based on the file extension (.tif or .tiff for TIFF files, .jpg or .jpeg for Jpeg files). Both uppercase and lowercase extensions are accepted.
The output file name supports a special syntax that simplifies the creation of output files with the same base-name of the input, but a different extension and/or destination path. For this, the special string %name% in the output file name gets replaced with the base name (without extension) of the input file. For example, the command
When resizing the image with the width and height export options, PhotoFlow uses the default vips_resize() function of the underlying VIPS library, with a lanczos3 kernel. This function has been tuned to provide a very good balance between sharpness of the resized image and presence of moire artefacts, as explained here and here. Moreover, the input image is always promoted to 32bit floating-point format and converted to linear Rec.2020 colorspace upon loading. Hence, and unless you do some colorspace manipulations via additional .pfi files passed through --config options, all resizing operations will be performed in linear gamma encoding for optimal results. The image data is converted to the output colorspace only after the resizing step.
The last two command-line arguments are the names of the input and output image files. The format of the output image is automatically guessed based on the file extension (.tif or .tiff for TIFF files, .jpg or .jpeg for Jpeg files). Both uppercase and lowercase extensions are accepted.
The output file name supports a special syntax that simplifies the creation of output files with the same base-name of the input, but a different extension and/or destination path. For this, the special string %name% in the output file name gets replaced with the base name (without extension) of the input file. For example, the command
photoflow --batch Pictures/image.tif Pictures/Web/%name%.jpgwill convert the input image to Jpeg and save it as image.jpg in the Pictures/Web folder.
A note about image resizing
When resizing the image with the width and height export options, PhotoFlow uses the default vips_resize() function of the underlying VIPS library, with a lanczos3 kernel. This function has been tuned to provide a very good balance between sharpness of the resized image and presence of moire artefacts, as explained here and here. Moreover, the input image is always promoted to 32bit floating-point format and converted to linear Rec.2020 colorspace upon loading. Hence, and unless you do some colorspace manipulations via additional .pfi files passed through --config options, all resizing operations will be performed in linear gamma encoding for optimal results. The image data is converted to the output colorspace only after the resizing step.
Thank you for some other informative website. The place else may just I get that kind of information written in such a perfect method? I have a venture that I am simply now running on, and I’ve been at the glance out for such info. Outdoor Accessories
ReplyDeleteDobra strona internetowa : Zonahobisaya
ReplyDeleteDobra strona internetowa : Sinopsis Film Terbaru
Dobra strona internetowa : Zonahobisaya
Dobra strona internetowa : Zonahobisaya
Dobra strona internetowa : Profil
Dobra strona internetowa : Zonahobisaya
Dobra strona internetowa : Zonahobisaya
Dobra strona internetowa : Zonahobisaya
Writing a reflective essay requires deep thinking, critical analysis, and the ability to connect personal experiences with academic concepts. Many students find this type of writing challenging due to its introspective nature. That’s where Reflective Essay Assignment Help becomes a valuable resource. Expert writers guide students in expressing their thoughts clearly, organizing their reflections effectively, and meeting academic standards. With professional support, learners can improve both their writing skills and their ability to engage in meaningful self-assessment.
ReplyDelete
ReplyDeleteMastering architecture requires not only creativity but also technical precision in areas like CAD modeling, urban planning, and structural integrity. Students often struggle with complex design submissions and theoretical concepts. That’s why turning to professional
architecture assignment experts can provide the right academic support. These experts ensure accurate solutions, timely delivery, and subject-specific guidance to help learners achieve top academic performance while managing demanding course loads.
Fivebpeol is redefining digital innovation by merging creativity, technology, and strategy into one powerful platform. Designed for forward-thinkers, it offers solutions that inspire growth, spark collaboration, and deliver measurable results. With Fivebpeol , businesses embrace the future while maintaining authenticity, efficiency, and trust at the heart of every experience.
ReplyDeleteTabooTube stands out by offering a platform where users can explore themes that are often considered outside the norm. It provides access to a diverse collection of videos on various unique subjects, TabooTube encouraging curiosity and open discussion. This space promotes freedom of expression and understanding, allowing users to explore ideas and perspectives that are seldom highlighted elsewhere.
ReplyDelete