However, compared to the Photoshop and GIMP versions the technique presented here is more flexible, for two main reasons:
- the luminosity mask will be associated to a group layer; therefore, the mask will be applied to any combination of filters and adjustments (curves, toning, sharpening, etc...) that you might include in the group
- we will create the luminosity mask "on-the-fly" by simply applying a curves adjustment to a greyscale copy of the input image. This way the mask will remain fully configurable and you will be able to immediately see the effect of a change in the selected luminosity range in the preview window
The steps described in the tutorial will at the end be saved into a preset so that they can be re-applied automatically to a different image. Again, photoflow presets have a certain advantage over GIMP scripts, as they simply re-create the original filter stack: as photoflow's filters are fully non-destructive, you will have the possibility to further tweak the settings (for example the curves adjustemt that defines the luminosity range) once the preset is loaded.
This time I decided to start from the end, and show the result of this tutorial (basically a mid-tones luminosity mask + strong contrast adjustment) to the same image shown at the beginning of Pat David's post. Here it is (move the mouse pointer over the image to see the original):

After applying the steps of this tutorial (mouse over to see the original).
Now let's see how to achieve that result, step by step...
Part of the steps described here have been already covered in detail in the Orton Effect tutorial(), therefore it might be a good idea to read it before starting or in case something is not clear.
Step 1: preparing the input and group layers
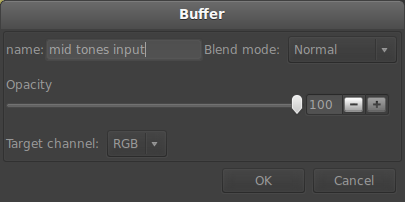
Then, add a buffer layer above the background layer and call it "mid tones input", as shown below:

You will see that many of my tutorials start by a buffer layer. The reason for that is explained in detail in the Orton Effect tutorial, so I suggest you to have a look there if you are not yet familiar with buffer layers and their use. Here I will just remind that they are a convenient way to mark a specific point in the processing flow. As they have a negligible impact in terms of memory and cpu usage, you can add as many of them as you like during editing.
Next, add a group layer above the buffer, and call it "Mid Tones". Our mid-tones mask is going to be associated to this group layer: whatever filter will be added inside the group layer, it's impact on the image will be "modulated" by the group's mid-tones mask.
Your photoflow window should look something like this:

Step 2: creating the mid-tones mask
At this point we can start creating the mid-tones opacity mask associated to the group layer. To start editing the mask, double-click on the gradient at the right end of the group layer. A new tab will appear in the layer list widget, where we will insert the layers needed to build the mask. Click on the "+" button at the bottom of the layers widget, switch to the "misc" tab of the tool slection dialog and select the line called "Clone layer". Your photoflow windows should look something like this:
After clicking "OK", the configuration dialog of the newly created "clone layer" will pop-up. Here we have to choose the input layer to be cloned and the input source channel. Select "mid tones input" as the layer name and "RGB" as the source channel. This will instruct the clone layer to use the pixels of the background image (or actually of anything below the "mid tones input" buffer layer) as source data; since the input is in RGB format and the target output is grayscale, the pixels will be internally converted using the same formula as GIMP's "desaturate" tool with the "luminosity" option. The clone configuration dialog should look similar to this:

Let me spend few more words on what "layer cloning" exactly means here. You might think of it as a sort of "smart copy": the clone layer "gets" the data of the source layer defined in the configuration dialog and sends them to its output. In practice it is like making a copy-and-paste of the source layer, except that the copy is done "on-the-fly" ad that there is actually no additional memory allocation involved... if the input image is modified, the copy will immediately and automatically reflect this change.
Well, I think it is getting way too technical... let's go back to the main subject!
Our mask for the moment directly reflects the luminosity of the image; instead, it should be white in the mid of the tonal range and black at the extremes. To obtain that, we are going to apply a curves adjustment to the mask. But before doing that, let's see how the mask can be visualized in the preview window, so that we can easily and immediately check the adjustments we are going to apply... with the clone layer selected, click on the "show active layer" toggle button-right of the preview area. The mask will be shown in red color on top of the edited image: the black areas in the mask will appear red in the preview, while the white areas will be transparent and the edited image will be fully visible. Here is how the photoflow preview should look like when showing the luminosity mask:

Now that we have a way to judge the effect of the adjustments applied to the mask, let's add a curves adjustment on top of the clone layer. Click as usual on the "+" button at the bottom of the layers widget, switch to the "color" tab in the tool selection dialog and select the "Curves" tool from the list (see below).

After clicking "OK", the curver layer is added and the corresponding configuration dialog is opened. At this point we can modify the grayscale values of the mask: create a control point in the middle of the curve and drag it to the top, then grab the rightmost control point and bring it to the bottom. Then bring the two extreme control points a bit to the right and left respectively, to further reduce the mid-tones range. You can also set the coordinates of the control points numerically once they are highlighted; in this case I have choosen the following values: (12.5,0) (50,100) (87.5,0). You should obtain a result similar to this screenshot:

The steps I have just described actually show another peculiar feature of photoflow: layer masks are handled as sub-images (or images-in-the-image) and can be edited the same way as the main image. You can non-destructively apply filters (curves, gaussian blurs, etc...) to the masks, you can group filters, and much more.
We are almost done now with the mask. The last step is to apply a bit of gaussian blur to the mask, so that small details in the dark and light areas of the image will not be "flattened" too much. Add a gaussian blur filter on top of the curves layer (you will find it in the "details" tab of the tool selection dialog, as shown below) and set the radius (equivalent to the "sigma" of the gaussian kernel) to something between 3 and 5 pixels (you can adjust it to taste).

Now you can switch back to the "Layers" tab in the layers widget and switch the preview mode to "show merged layers" with the corresponding toggle button at the bottom of the preview area.
Step 3: increasing the mid-tones contrast
Up to now, the preview image looks exactly the same as the original one, despite all our efforts to create a nice mask to selectively edit the mid tones... don't worry, it's not a mistake and we are going to change that now. What we have at the moment is an empty group layer with an associate opacity mask that selects the mid-tones of the image. As I said at the beginning, this means that any filter which is added to this group will prevalently act on the mid-tones, leaving the shadows and highlights unchanged. To verify that, let's add a simple brightness/contrast filter into the group: to do that, you have to first select the empty line below the group layer and then click on the "+" button at the bottom of the layers widget. The "brightness/contrast" filter can be found in the "color" tab of the tool selection dialog (like for the "Curves" tool). This is how your photoflow windows should look like at this point:
Finally, increase the contrast from zero to about 0.4 and check the preview window while you do that: the contrast increase will be maximal in the mid-tones region, while shadows and highlights will not be affected. You can toggle the visibility of the brightness/contrast layer on and off to compare with the original image.

That's it! Of course, you can replace the brightness/contrast tool with something else, like a curves adjustment (or a combination of several filters, as long as they are all inside the "Mid Tones" group), and their effect will be limited to mid tones as well.
Step 4: saving the mask as a preset
It would be a pity to be obliged to redo all this steps each time we want to apply this technique to an image. Fortunately, photoflow allows to save a group of layers as a preset, which can be reloaded and applied to other images.Since what we are interested in is the masking technique itself, and not the actual contrast adjustment that we have just applied, I suggest you to drag the brightness/contrast layer outside of the group (either above it, or below the buffer layer) before saving the preset (see screenshot below).

Then, select both the "Mid Tones" group layer and the "mid tones input" buffer layer and then click on the "Save" button at the bottom/right of the main window. A file chooser dialog will appear in which you can specify the location and file name for your preset, which should end with extension ".pfp". Choose whatever you prefer and click "OK" to save the file. Now you will be able to apply the mid-tones masking technique to any other image by simply reloading the preset via the "Load" button at the bottom of the layers widget!
Bottom line: the effect of blurring the mask
Here is one more example showing how the blurring of the mid-tone mask affects the small details in the shadows and highlights (here more evident in the shadows). The image below is obtained with a blurred mask; is you move the mouse pointer over the image, the version without blur will be shown instead. Look at how the details in the dark parts of the bison's fur and skin are rendered in the two cases...

Very interesting tutorial. Things seem to have changed a bit, with the way the program works. But, when it is realized that now the push pin shows the mask, things went well. Thank you, once again, for this information.
ReplyDeleteYes, indeed the tutorial in now outdated from the UI point of view... On the other hand, it should clarify the use of the curves tool in the context of layer masks, as well as the basic idea behind the "clone" tool.
DeleteHere are a couple of video tutorials that are related to luminosity and/or color masking (not mine):
https://plus.google.com/u/0/+AndreasKatifes/posts/6Sy3Zx1hSUN
https://plus.google.com/u/0/+AndreasKatifes/posts/RcxSTKJY5DX
This comment has been removed by the author.
ReplyDeletePhoto editing is an art of bringing back the lost glory of the images or enhancing the beauty of them with the use of some additional features and applications. image background removal
ReplyDeleteMany photographers are just individuals with cameras and maybe a slick website. Make sure your photographer is backed by a legal, legitimate business. wedding photographer
ReplyDeleteDiscovering Luminosity Mask with PhotoFlow is a game-changer in photo editing! This is an advanced technology. Learning how to create and use these masks can really enhance your editing skills and take your photos to the next level. Thanks for highlighting this powerful feature.
ReplyDeleteBut currently PicsArt Pro can prove to be a game-changer for you.